
Using HoYoShade Hub Launcher
HoYoShade Hub is a modern graphical launcher (WinUI 3) designed for HoYoShade. It provides one-click framework and shader installation, network bypass settings (DoH + ECH), multi-game client management, and automated shader injection.
Step 1: Download and Installation / Extraction
Head over to HoYoShade Hub GitHub Releases to download the latest release packages.
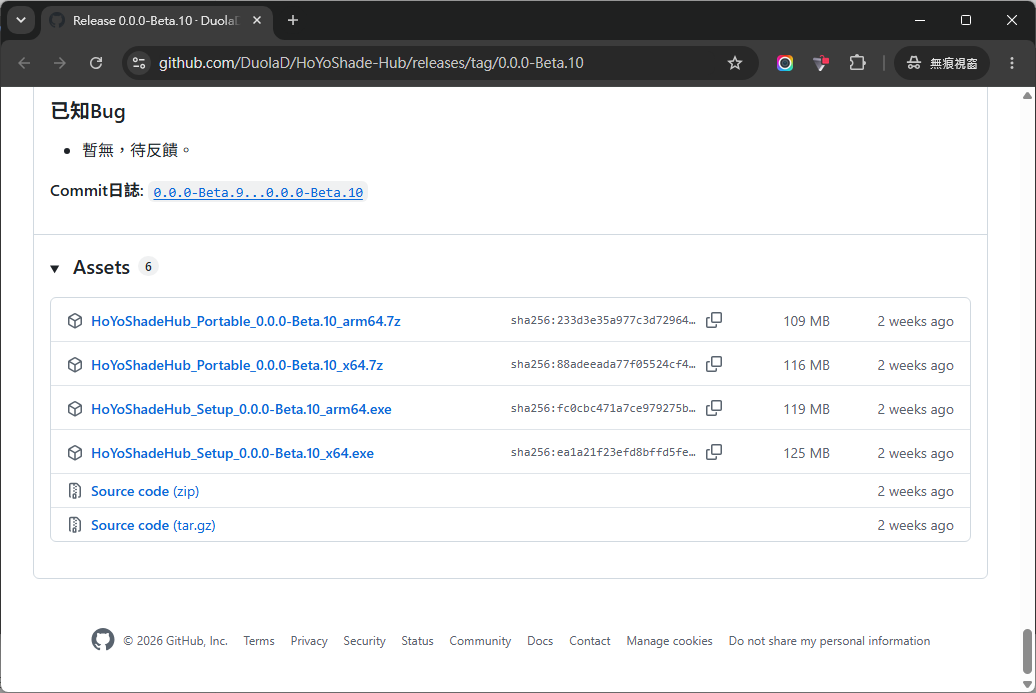
1. Choose Matching Processor Architecture
x64: For the vast majority of standard Windows desktop PCs and laptops equipped with Intel or AMD 64-bit processors.arm64:For Windows on ARM devices, including Qualcomm Snapdragon (Snapdragon X Elite / Plus), Surface Pro ARM, or macOS virtualization (Parallels Desktop WOA).
2. Choose Package Format
- Setup Edition (
HoYoShadeHub_Setup_*.exe) (Recommended): Standard Windows setup installer. Automatically sets up the runtime environment and creates desktop and Start Menu shortcuts. Recommended for most users. - Portable Edition (
HoYoShadeHub_Portable_*.7z): Standalone green archive requiring no installation. All configurations and data stay localized in the extracted directory. Best for portable drives or users who prefer not to register programs into the system.
3. Installation & Extraction Guide
Option A: Setup Edition (Recommended)
- Double-click the downloaded
HoYoShadeHub_Setup_*.exe. - The installer wizard will open. Confirm or click Change to select your install destination (
C:\Program Files\HoYoShade Hubby default). - Check the box agreeing to the User Agreement and Privacy Policy, then click Install.
- Once installation finishes, launch HoYoShade Hub directly from your desktop shortcut or Start Menu.
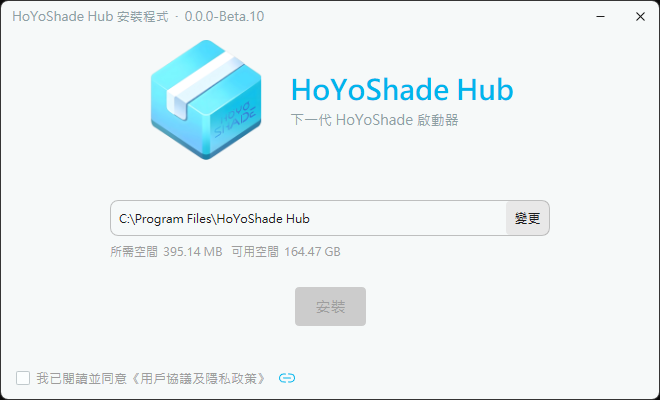
Option B: Portable Edition (Extract & Run)
After downloading the .7z archive, extract it to any directory with normal write permissions (an English path is recommended):
- Built-in Windows Extractor: Modern Windows 11 natively supports
.7zarchives. Right-click the.7zfile, click Extract All..., choose the destination folder, and click Extract. - Using 7-Zip: For Windows 10 or for a faster, more dependable extraction experience, download and install the free, open-source 7-Zip. Open the archive with 7-Zip, click the Extract button on the toolbar (or right-click the file and choose 7-Zip → Extract to...).
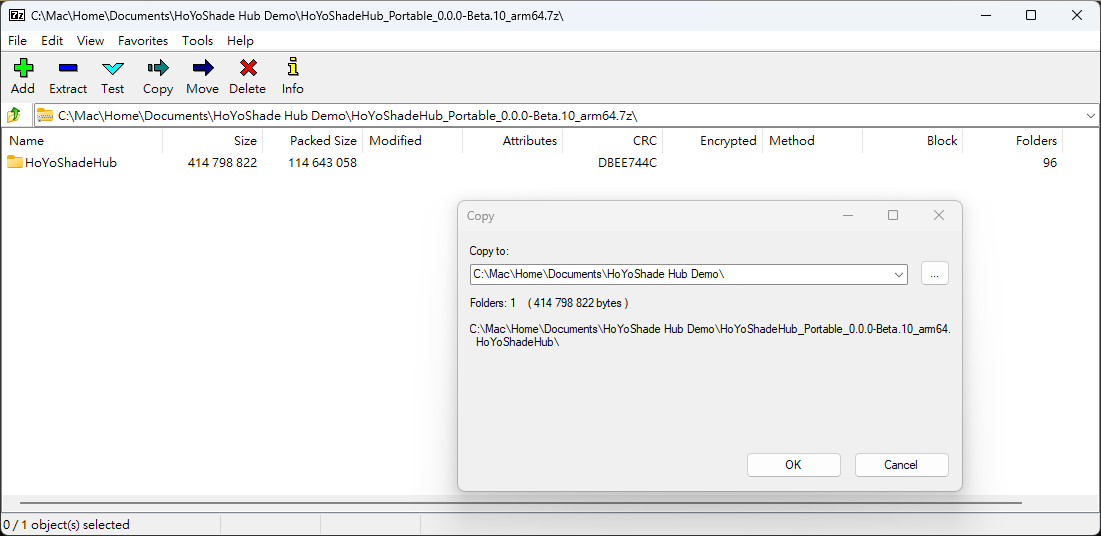
Once extracted, open the folder and launch HoYoShadeHub.exe:
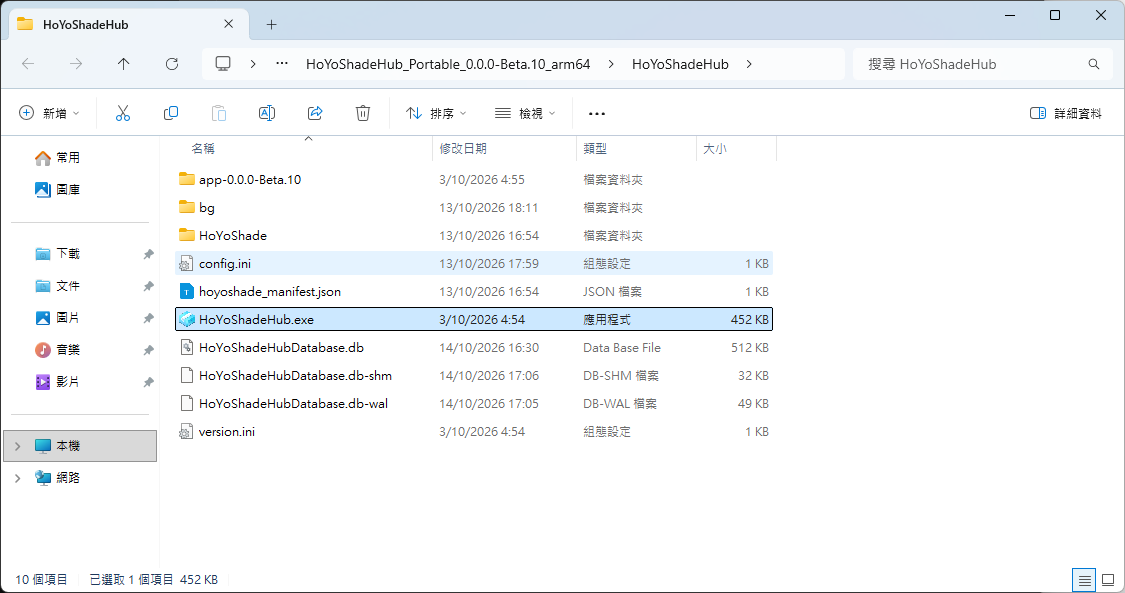
Runtime Prerequisites
- OS Requirement: Windows 10 1809 (Build 17763) or later.
- WebView2 Runtime: Pre-installed on Windows 11 and most updated Windows 10 systems. If prompted on launch, download and install it from Microsoft's official site.
- WebP Image Extension: Used to render background wallpapers in the launcher. If backgrounds appear black or missing, install it for free from the Microsoft Store.
- For the best visual experience, enable Transparency effects and Animation effects in Windows Settings.
Step 2: Initial Launch and Environment Checks
After extracting or installing, run HoYoShadeHub.exe. On first launch, the setup wizard runs an environment check verifying the WebView2 Runtime, WebP decoder, and network connectivity.
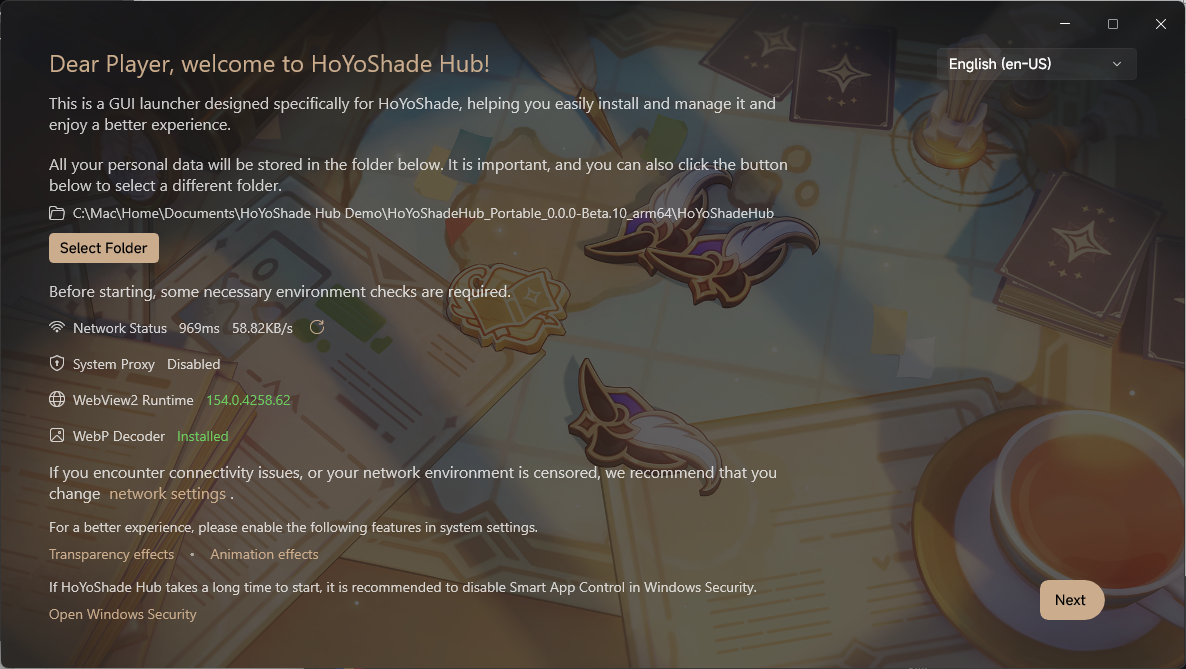
Use the dropdown in the top-right corner to switch the display language (English, Simplified Chinese, Traditional Chinese Hong Kong, and Traditional Chinese Taiwan are supported). The center panel displays the default user data directory; click Select Folder if you prefer a custom storage location.
Connection Issues or Restricted Network? Configure DoH and ECH
If your network experiences throttling or DNS blocking when connecting to GitHub or remote mirrors, click the network settings link on the welcome screen to enable DNS over HTTPS (DoH) and Encrypted Client Hello (ECH).
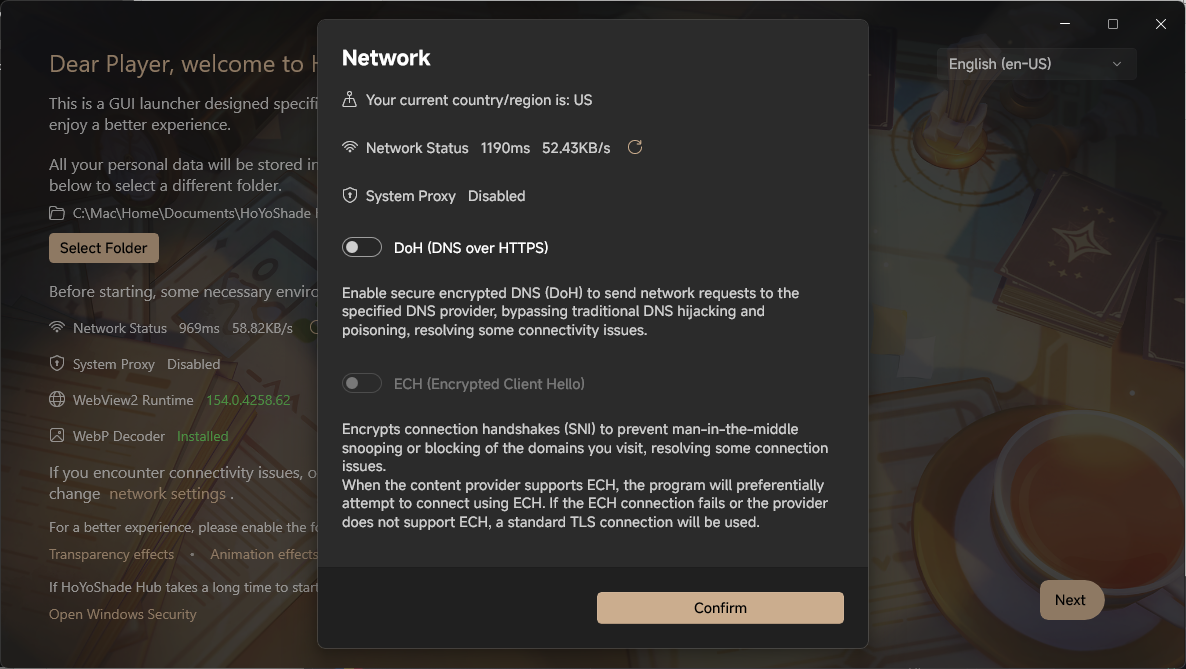
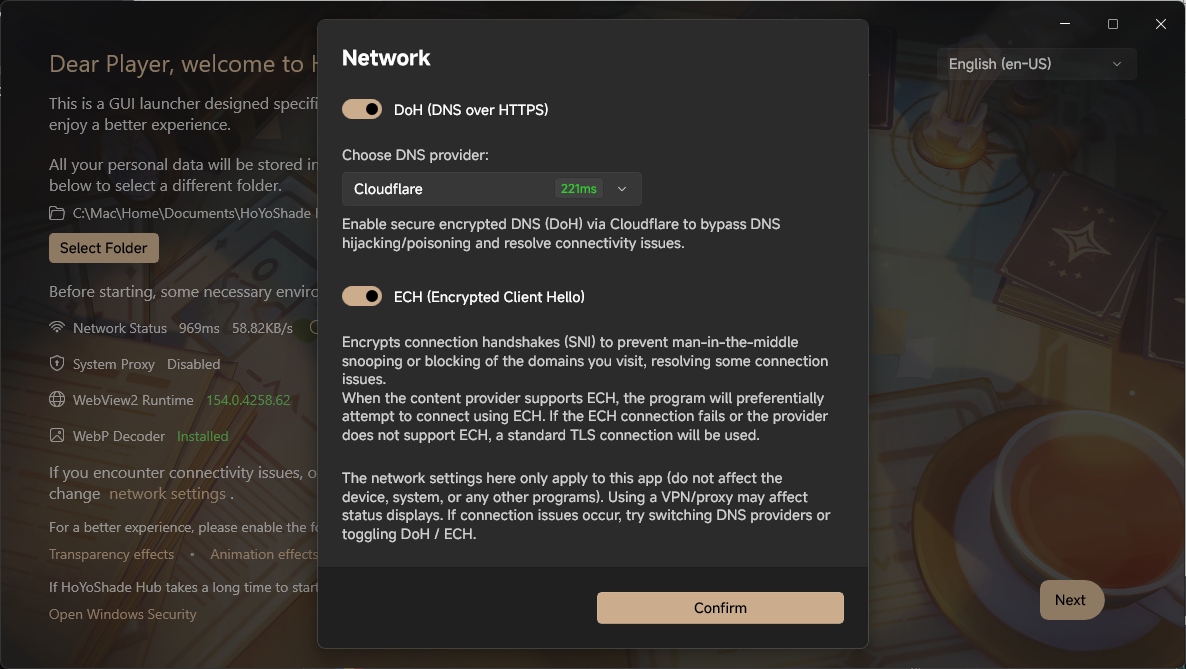
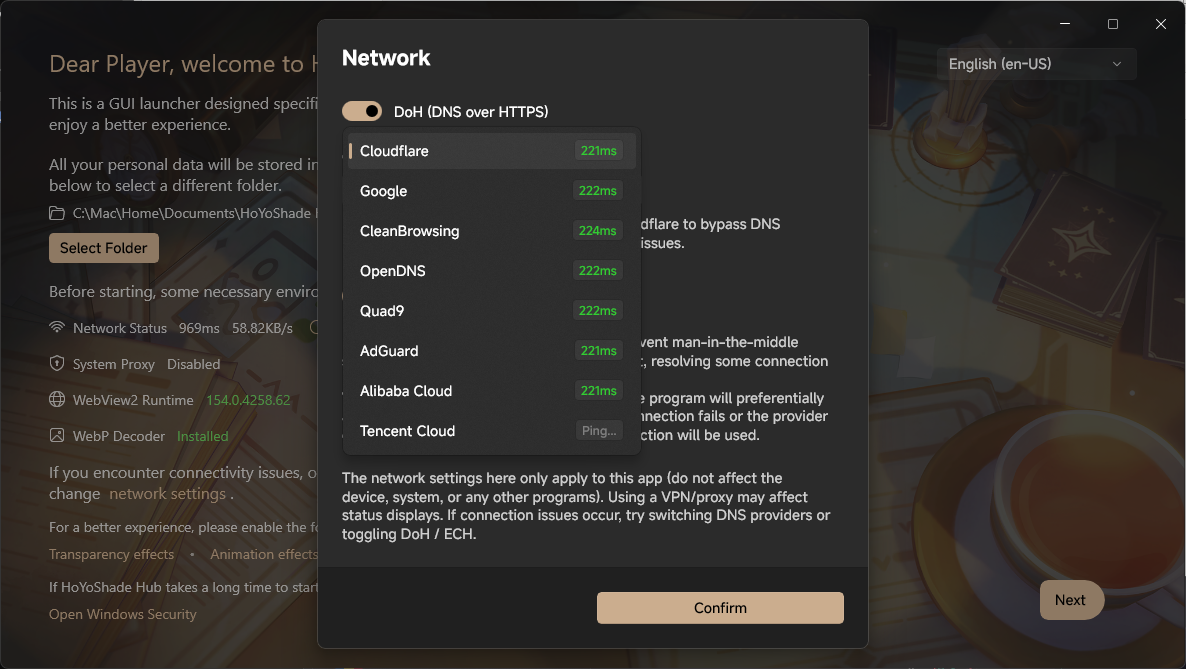
Once DoH is enabled, select a low-latency DNS provider from the dropdown (such as Cloudflare, Google, CleanBrowsing, or regional mirrors) to bypass DNS hijacking:
Once the environment checks pass, click Next in the bottom-right corner.
Step 3: Quick Start and Component Installation
On the "Ready to Begin?" quick setup screen, the launcher selects the latest stable HoYoShade framework and the complete ReShade shader/addon pack by default.
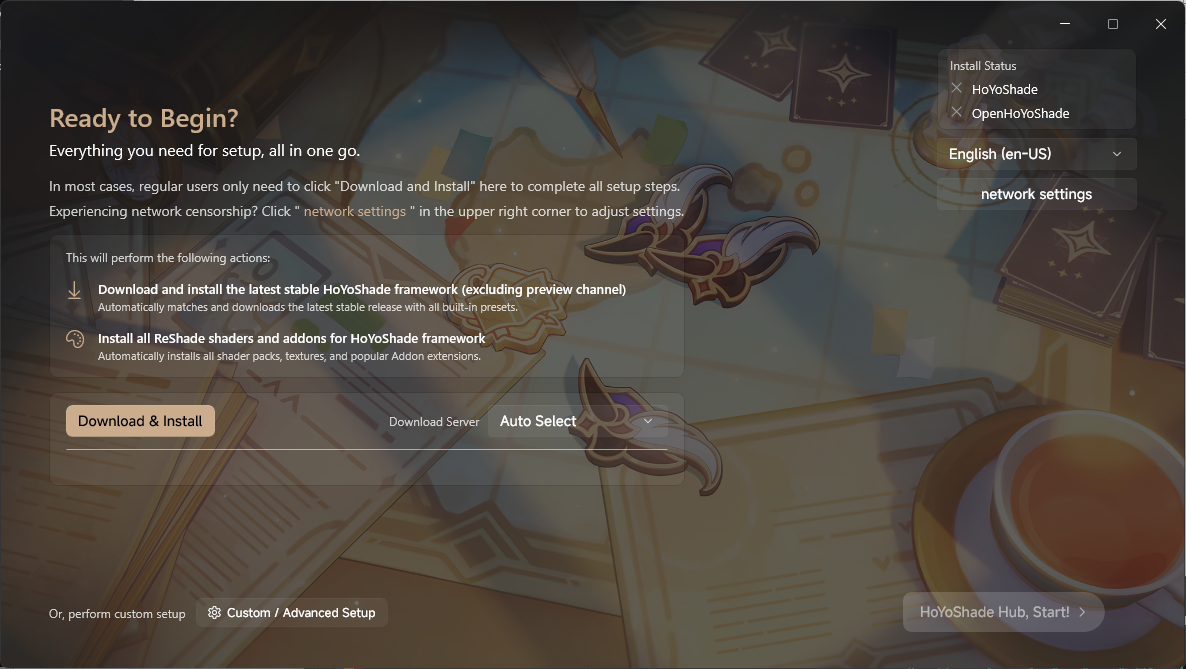
- Click Download & Install.
- The launcher connects to the mirror server to download and extract the HoYoShade framework, shaders, and common addons.
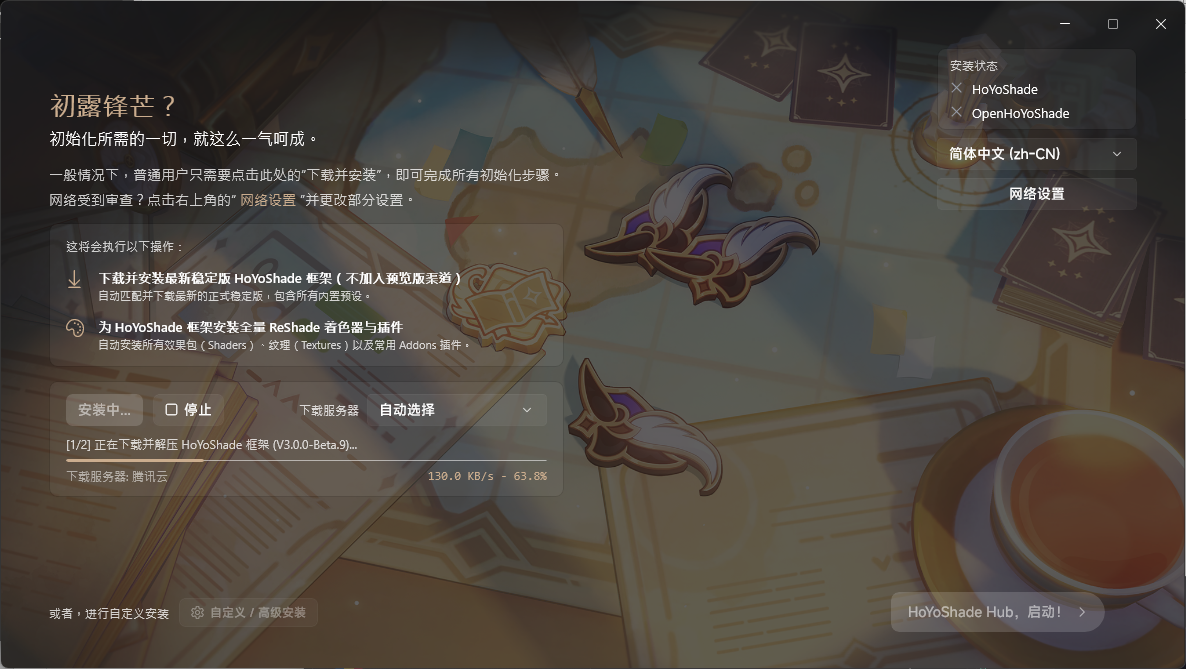
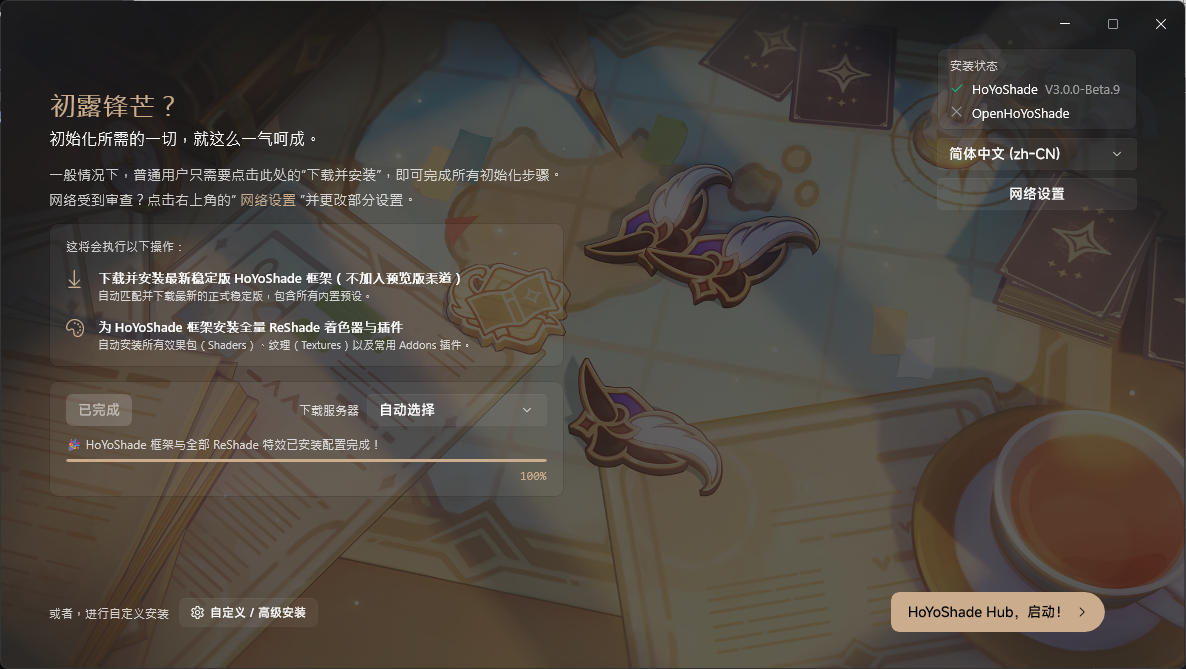
Once installation completes, the HoYoShade Hub, Launch! button in the bottom right will highlight. Click it to enter the main dashboard.
Step 4: Game Detection and Path Configuration
Upon entering the main dashboard, the launcher prompts to scan for local installed game clients in the top left:
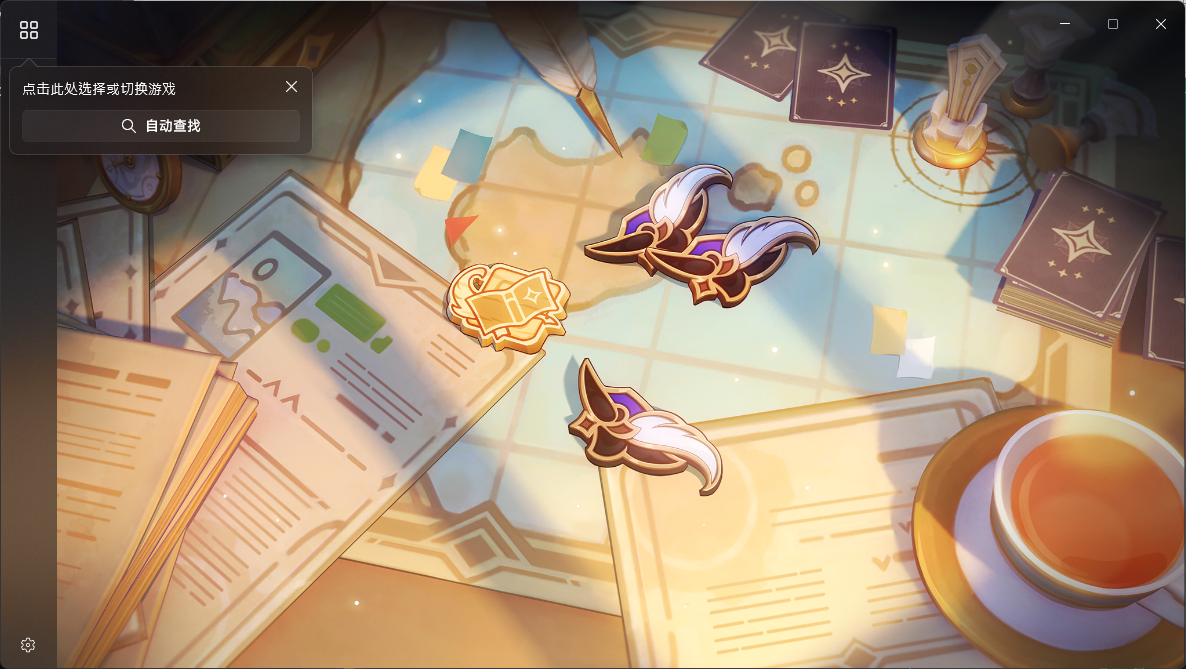
Click Auto Search to automatically detect miHoYo / HoYoverse clients registered in Windows Registry.
Game Not Found? Manually Add Game Directory
If your game client is located in a custom path, on an external drive, a portable directory, or a virtual machine shared folder, the registry entry may not be found. You can locate it manually:
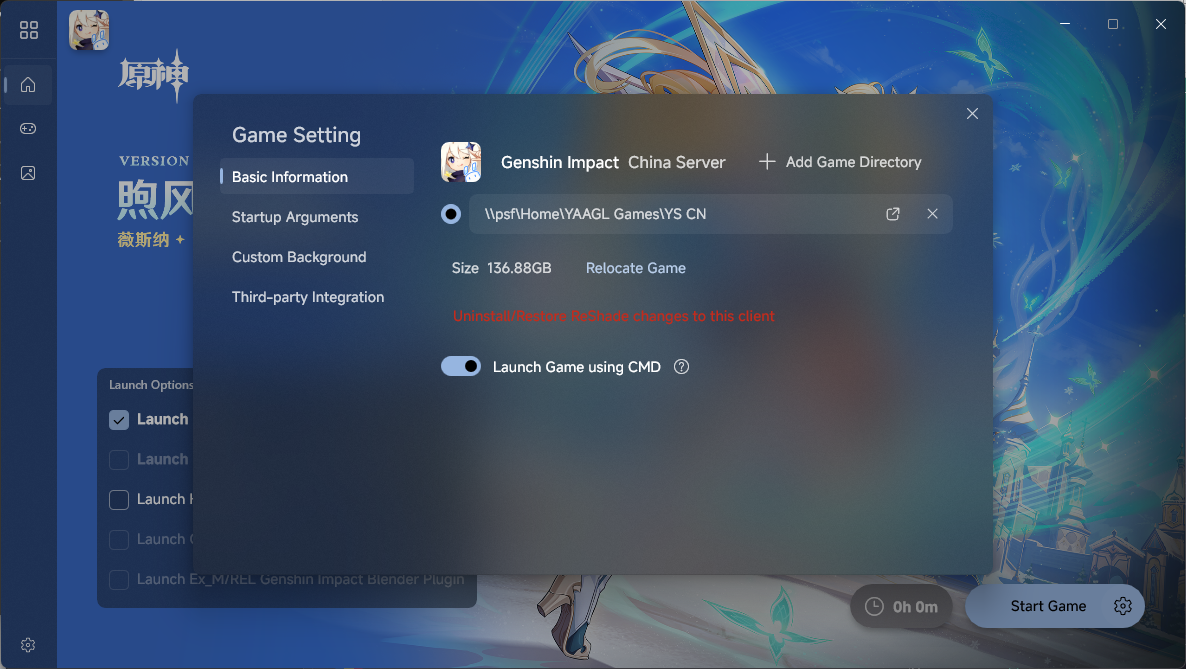
- Click the grid icon or game icon in the top-left corner to switch to your target game (e.g. Genshin Impact Global / CN).
- Click the gear settings icon next to Start Game in the bottom-right corner to open the Game Settings page.
- Click + Add Game Directory or Relocate Game, and select the folder containing the game executable (e.g. the folder containing
GenshinImpact.exeorYuanShen.exe).
Step 5: Configure Launch Options and Start Game
Once the game path is configured, the dashboard displays the game artwork and controls.
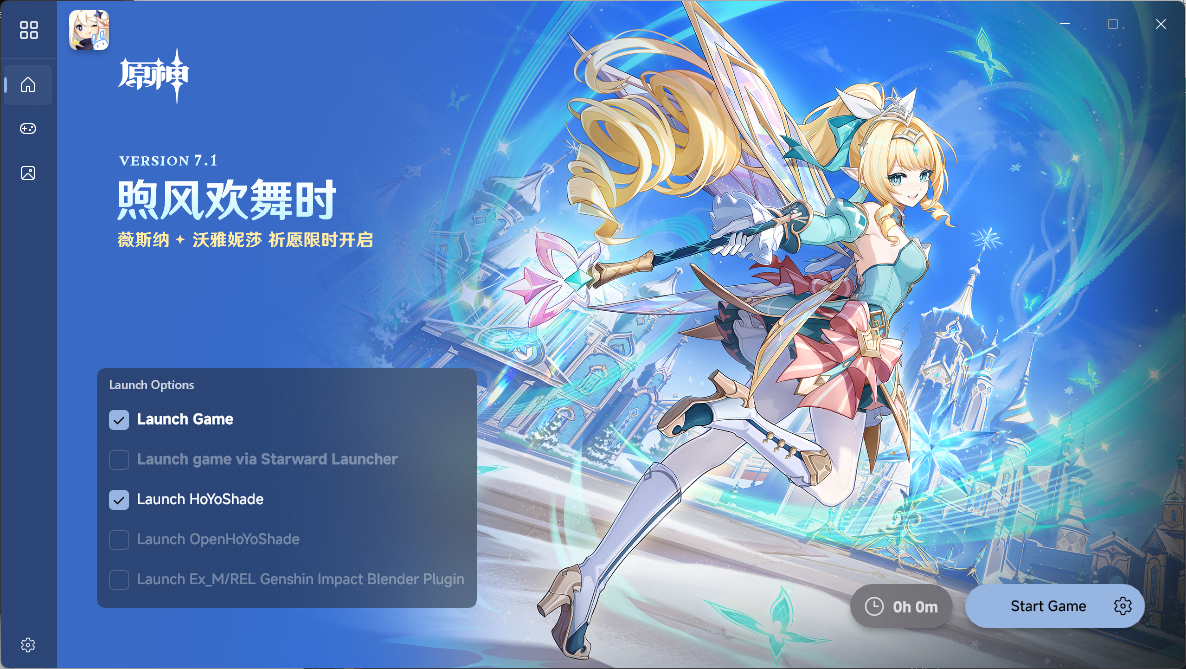
In the bottom-left Launch Options card:
- Check Start Game: Launches the official game client.
- Check Start HoYoShade: Automatically attaches HoYoShade graphics core on game launch.
- (Optional) Toggle Enhanced Graphics (DX12) or other advanced startup options as needed.
Review your choices and click Start Game in the bottom-right corner.
Step 6: In-Game Verification and Effects Tuning
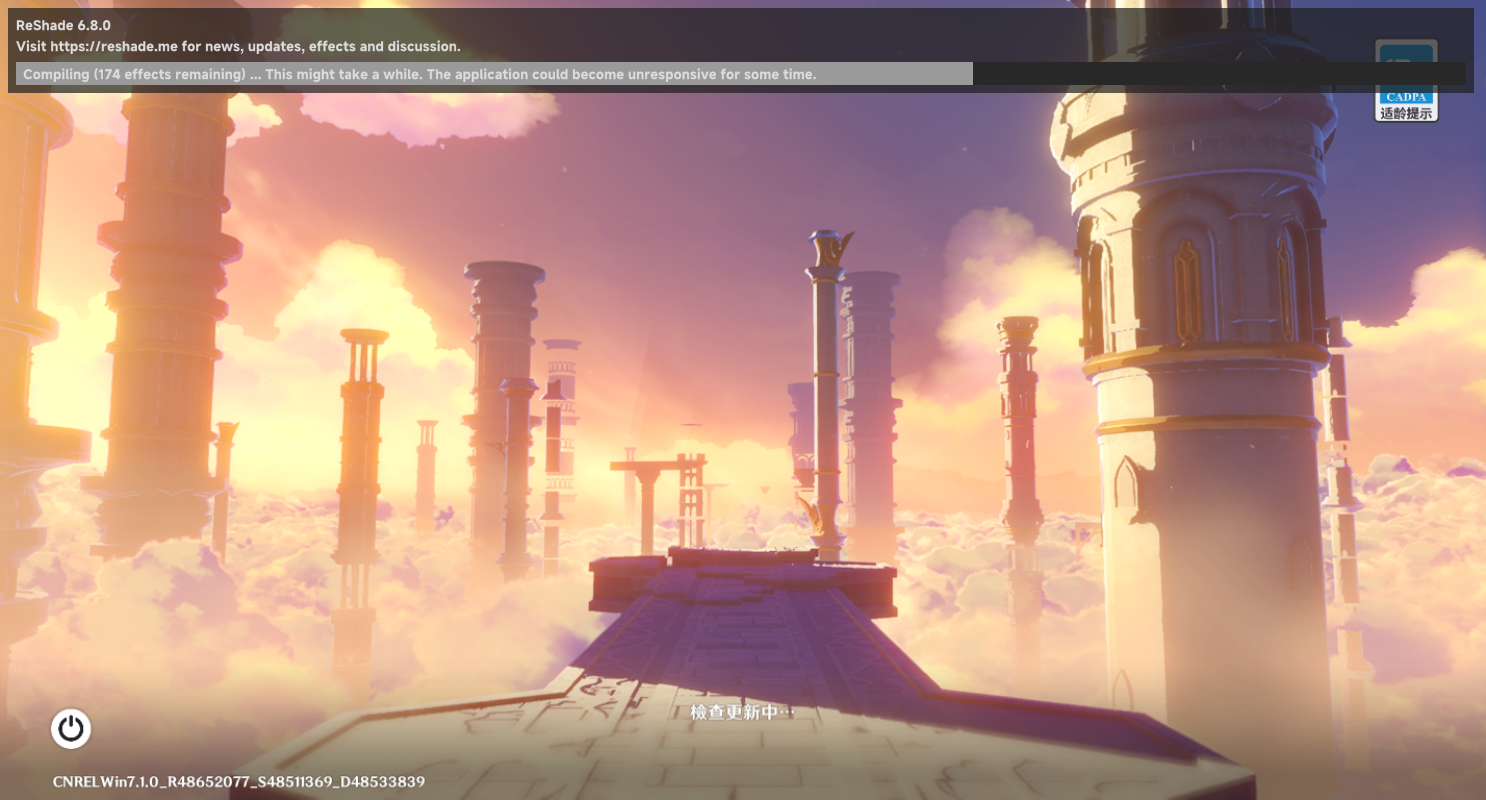
When the game launches, HoYoShade hooks into the rendering pipeline. During the initial game loading screen, the ReShade status banner appears at the top:
Once shader compilation completes, the status bar confirms installation:
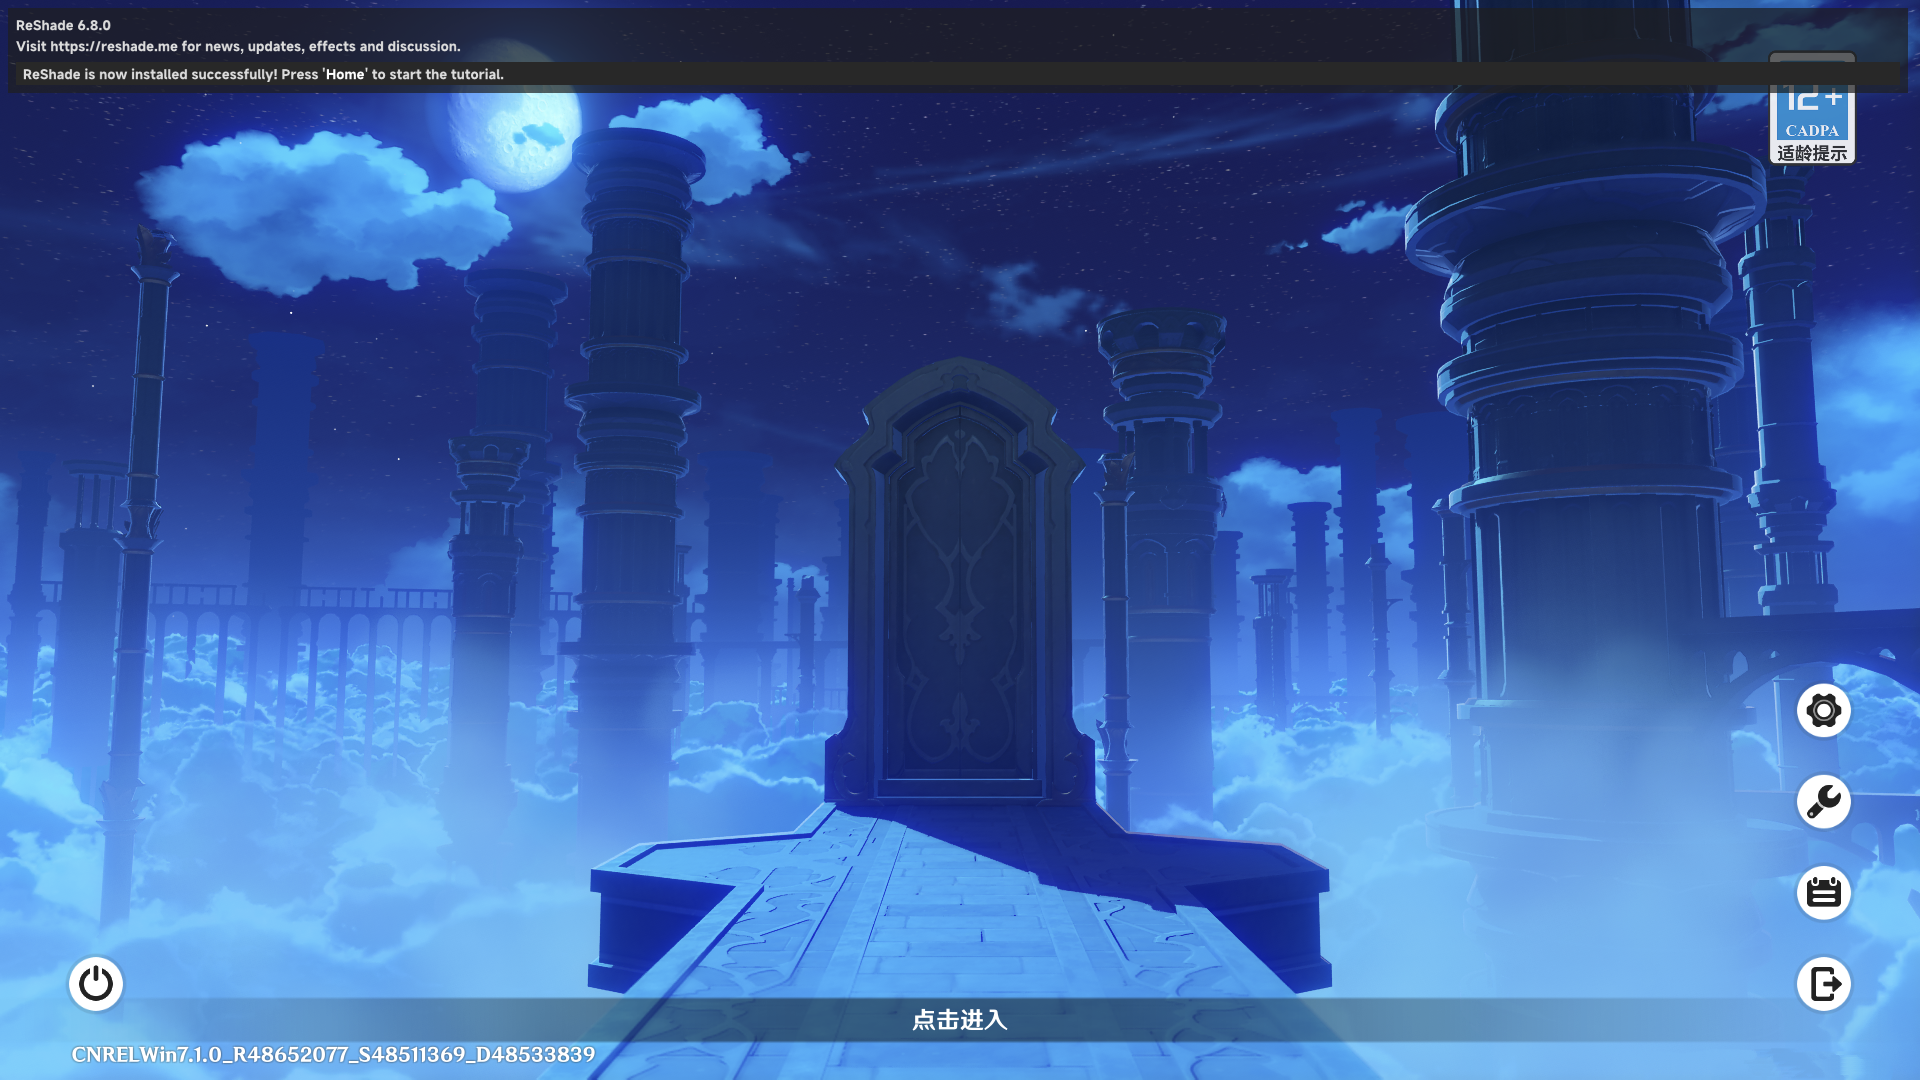
- Press Home on your keyboard to open the ReShade overlay.
- Select from the bundled presets in the top dropdown to experience real-time lighting and graphic enhancements.
- For troubleshooting or hotkey remapping, consult the Troubleshooting Guide.